Benefit Bridge Data Collection Tool Help
Logging into BBCT
Dashboard
Recipients
Manage Users
Manage Programs
Manage Services
Manage Case Workers
Reports
BBCT Help - Recipients
To access recipients, click on the Recipients menu link
Topics
Recipient
Enrollment
Goals
Financial Snapshot
Employments
Programs
Services


Search for a Recipient
Before adding a recipient, search for the recipient to ensure they are not already in the BBCT system.
  1. Enter all or part of the recipient’s first or last name or all or the beginning part of their SSN and click the
    Search Recipient
    button.
  2. A list of Recipients matching the search criteria will be displayed in the Recipients grid (see image below).
  3. Search Results
Add a Recipient
  1. Click the
    Add New Recipient
    button in the Search area.
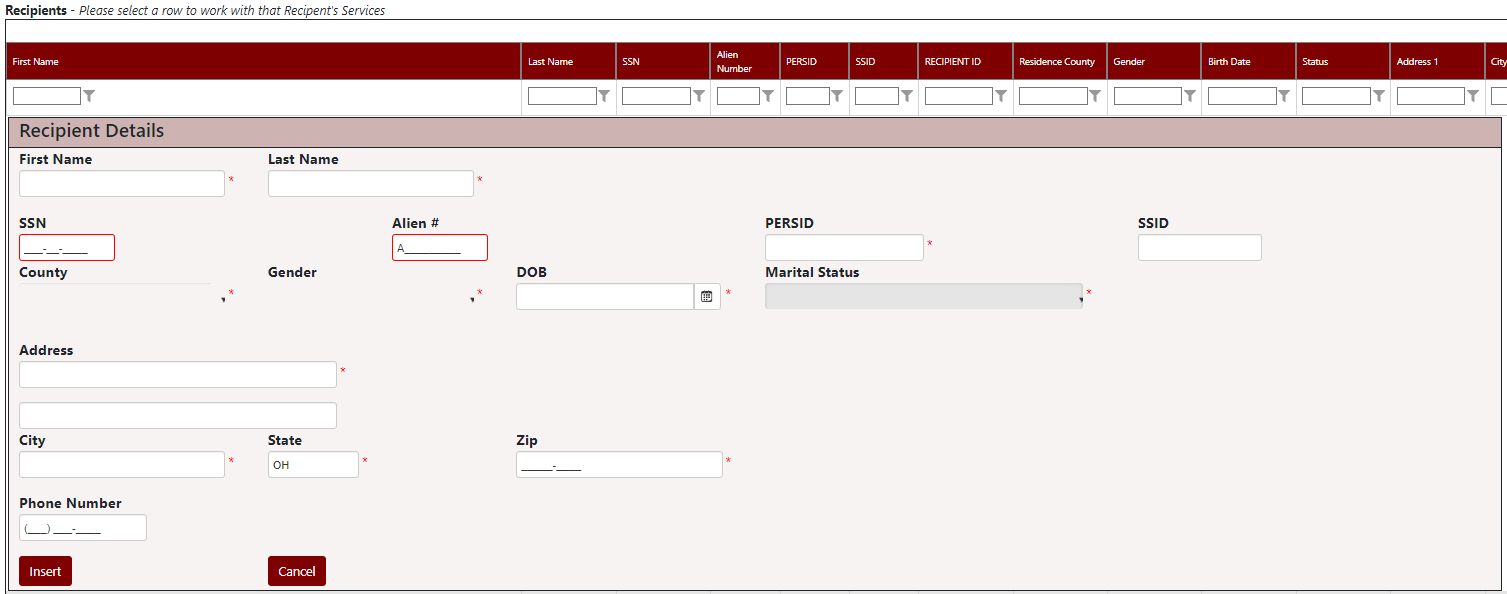
  2. The add Recipient form will display (see image below).
  3. Add Recipient image
  4. Click the
    Insert
    button to save the recipient. Cancel adding by clicking the
    Cancel
    button.

Edit a Recipient
  1. Click the Edit button in the Recipient search grid of the Recipient line you wish to edit.
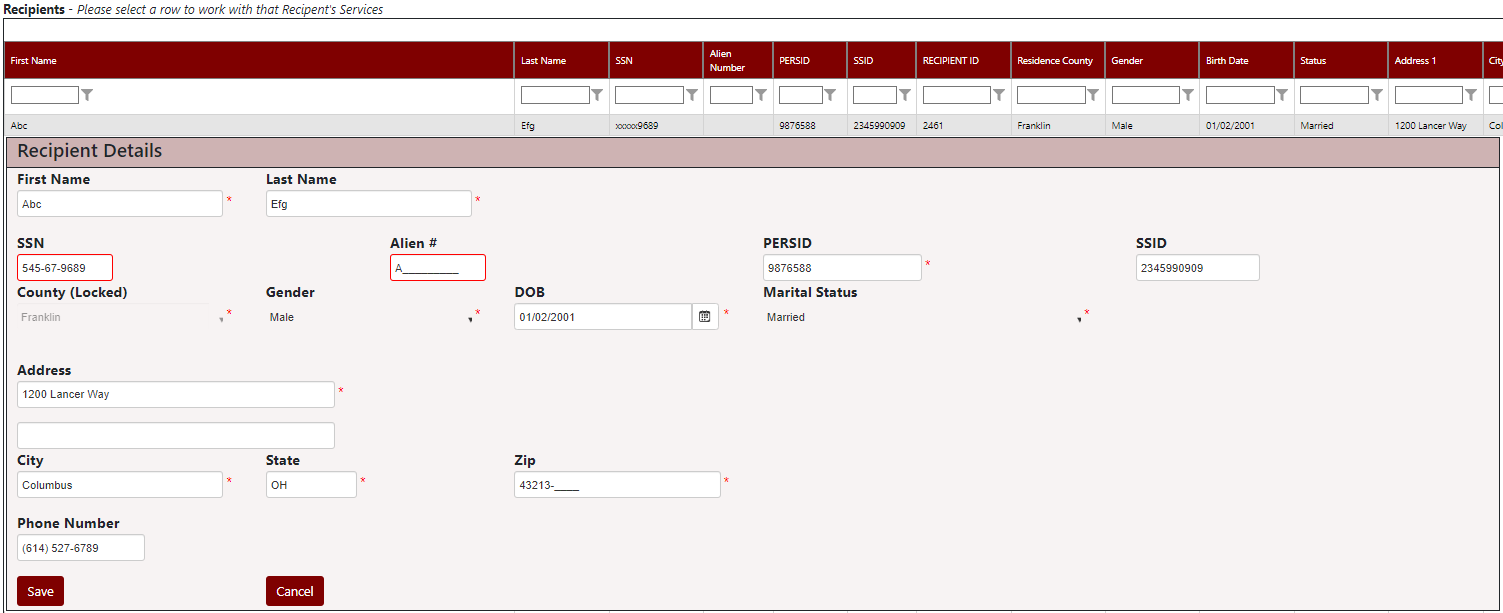
    The Edit Recipient form will be displayed (see image below).
    Edit Recipient image
  2. Make any needed changes to the Recipient information and then click the
    Save
    button to save the changes.
    Cancel changes by clicking the
    Cancel
    button.

Deleting a Recipient
  1. Click the Delete button in the Recipient search grid of the Recipient line you wish to delete.
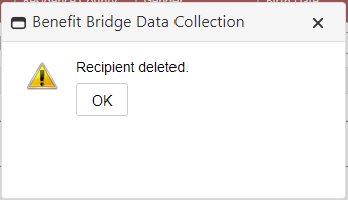
    If there are no enrollments for the Recipient, the Recipient will be deleted and a message displayed.
    Delete Recipient image

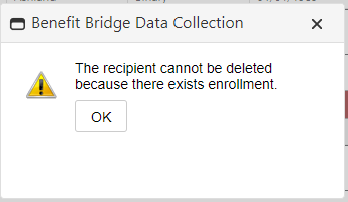
    If enrollments exist, this message will be displayed.
    Enrollments exist image

Add an Enrollment
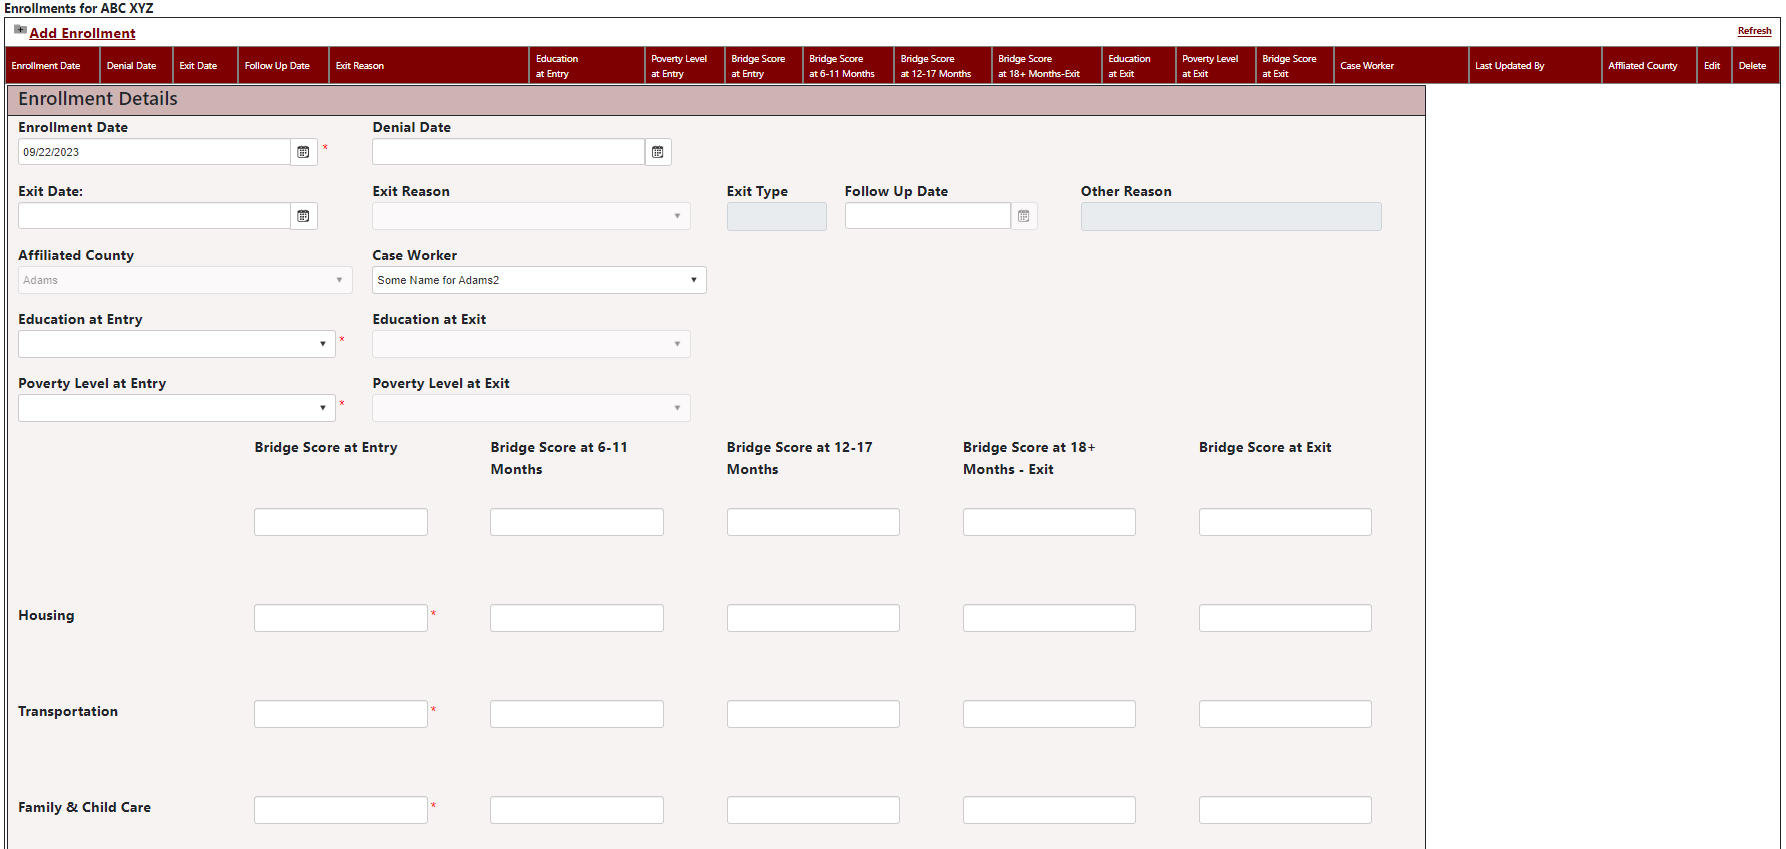
  1. Click the Add New Enrollment link in the Enrollment grid.

    The Enrollment form will be displayed.
    Enrollment form image
    • Enrollment Date: An Enrollment date is required.
      Affiliated County: If you are a county user, the affiliated county will default to your county. Otherwise, pick the correct county from the list.
      Case Worker: Select a case worker from the drop down.
      Education at Entry: Education at Entry is required.
      Poverty Level at Entry: Poverty Level at Entry is required.
      Bridge Score Categories: Bridge Score values for Housing, Transportation, Family & Child Care, etc. are required for the associated time period.
      Savings and Debt Amounts: Savings and Debt Amounts are required for the associated time period.
      Number of Adults, Chidren within home, and Children outside home: Number of Adults, Chidren within home, and Children outside home are required.
      SNAP, Medicaid Adult, and Medicaid Children at Entry: SNAP, Medicaid Adult, and Medicaid Children at Entry are required.
      Co-Enrollments for WIOA or any other Co-Enrollments: Co-Enrollments for WIOA or any other Co-Enrollments are required and any other Co-Enrollment must be described.
Edit an Enrollment
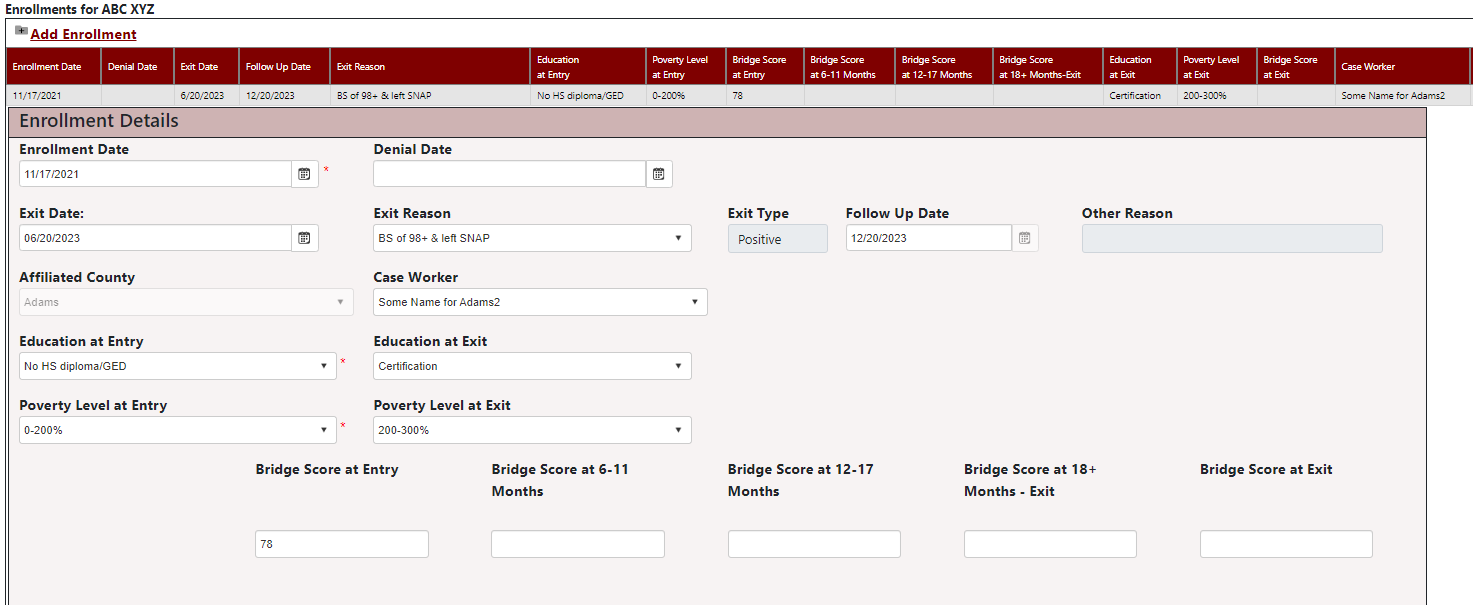
  1. Click the Edit button in the Enrollment grid of the Enrollment line you wish to edit. Enrollment grid image
    The Edit Enrollment form will be displayed (see image below).
    Edit Enrollment image
  2. Make any needed changes to the Recipient information and then click the
    Save
    button to save the changes.
    Cancel changes by clicking the
    Cancel
    button.

Exit an Enrollment
  1. Click the Edit button in the Enrollment grid of the Enrollment line you wish to exit. Enrollment grid image
    The Edit Enrollment form will be displayed (see image below).
    Edit Enrollment image
  2. Add a date into the Exit Date field within the Enrollment information, additional Exit-based fields will then become mandatory and will require values. Finally click the
    Save
    button to validate the data and save the changes. Cancel changes by clicking the
    Cancel
    button.

Delete an Enrollment
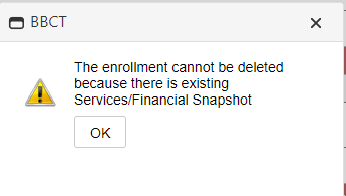
  1. Click the Delete link in the Enrollment grid of the Enrollment line you wish to delete. Enrollment grid image
    If there are financial snapshots or services associated with the Enrollment, you will see this message:
    Edit Enrollment image
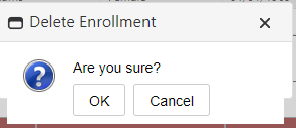
    Otherwise, you will see a confirmation dialog to confirm the delete:
    Edit Enrollment image

Add a Goal
  1. Click the Add Goal link in the Goal grid.

    The Goal form will be displayed.
    Goal form image
    • Goals: A Goal type is required.
      Education: If Goal Type: Education is selected, the education list becomes available becomes required.
      Target Date: Target Date is required.
      Start Date: Start Date is required.
      Pillar: Pillar is required and assigned by Goal type selection.
      Subpillar: Pillar is required and assigned by Goal type selection.
      Attained?: Attained is based on if the Goal was attained.
      Attainment Date: Attainment Date will become available if "Attained?" is selected as 'Yes', and will then be required.
Edit a Goal
  1. Click the Edit button in the Goal grid of the Goal line you wish to edit. Enrollment grid image
    The Edit Goal form will be displayed (see image below).
    Edit Goal image
  2. Make any needed changes to the Goal information and then click the
    Save
    button to save the changes.
    Cancel changes by clicking the
    Cancel
    button.

Delete a Goal
  1. Click the Delete button in the Goal grid of the Goal line you wish to delete. Goal grid image

Add Financial Snapshot
  1. Click the Add Financial Snapshot link in the Financial Snapshot grid.

    Add Financial snapshot image

    The financial snapshot form will be displayed.

    Financial snapshot form image
*Financial Snapshots must be entered in chronological order.*
Quarter (required):
Defaults to the current quarter.
Number of Adult(required):
Enter the number of adults.
Number of Children Inside Home (required):
Enter the number of children inside home.
Number of Children Outside of Home (required):
Enter the number of children outside of home.
Housing?:
Select Rent,Own or Other.
Housing Amount:
Enter the amount spent for housing.
Housing Comment:
Enter any relevant comments related to housing.
Transportation?:
Select Yes or No.
Transportation Amount:
Enter the amount spent for transportation.

Transportation Comment:
Enter any relevant comments related to transportation.
Checking?:
Select Yes or No.
Checking Amount:
Enter the checking amount .

Checking Comment:
Enter any relevant comments related to checking.
Meets CS Obligation?:
Select Yes or No.
CS Obligation Amount:
Enter the CS Obligation amount .
Meets CS Obligation Comment:
Enter any relevant comments related to CS Obligation.

2. Click the
Insert
button to save the Financial Snapshot. Cancel adding by clicking the
Cancel
button.

Employments
Add an Employment
  1. Navigate to the Recipient's Financial Snapshot to which you want to add an employment.
  2. Click the Add Employment link in the Employment grid Employment grid image

    The Employment form will be displayed (see image below).

    Employment Add image
  3. After enter an employer name, wage, hours per week, and start date.
    Click the
    Insert
    button to add the employment.
    Cancel the insert by clicking the
    Cancel
    button.

Edit an Employment
  1. Navigate to the Recipient's Financial Snapshot to which you want to edit a employment.
  2. Click the Edit link on the row in the Employment grid you wish to edit. Employment grid image

    The Employment edit form will be displayed (see image below).

    Program Add image
  3. Make changes as needed and then click the
    Save
    button to update the Employment.
    Cancel the changes by clicking the
    Cancel
    button.

Delete an Employment
  1. Navigate to the Recipient's Financial Snapshot to which you want to delete a employment.
  2. Click the Delete link on the employment line you wish to delete. Delete Employment image
    You will see a confirmation dialog to confirm the delete

Programs
Add a Program
  1. Navigate to the Recipient's Financial Snapshot to which you want to add programs.
  2. Click the Add Program link in the Program grid Program grid image

    The Program add form will be displayed (see image below).

    Program Add image
  3. Select a program
    Enter an amount if available
    Enter a comment if needed
    Click the
    Insert
    button to add the program.
    Cancel the insert by clicking the
    Cancel
    button.

Edit a Program
  1. Navigate to the Recipient's Financial Snapshot to which you want to edit a programs.
  2. Click the Edit link on the row in the Program grid you wish to edit. Program grid image

    The Program edit form will be displayed (see image below).

    Program Add image
  3. Make changes as needed and then click the
    Save
    button to update the program.
    Cancel the changes by clicking the
    Cancel
    button.

Delete a Program
  1. Navigate to the Recipient's Financial Snapshot to which you want to delete a programs.
  2. Click the Delete link on the Program line you wish to delete. Program grid image
    You will see a confirmation dialog to confirm the delete
Edit a Financial Snapshot
  1. Click the Edit button in the Enrollment grid of the Enrollment line you wish to edit. Enrollment grid image

    The Edit Financial Snapshot form will be displayed (see image below).
    Edit Enrollment image
  2. Make any needed changes to the Financial Snapshot information and then click the
    Update
    button to save the changes.
    Cancel changes by clicking the
    Cancel
    button.
Delete a Financial Snapshot
  1. Click the Delete link on the Financial Snapshot line you wish to delete. Finanical Snapshot grid image

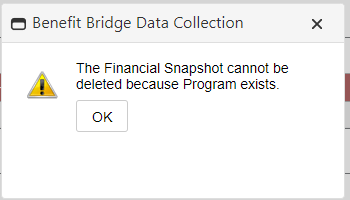
    If one or more programs exist for the Financial Snapshot, you will receive an alert indicating that the Financial Service cannot be deleted.

    Finanical Snapshot program exist

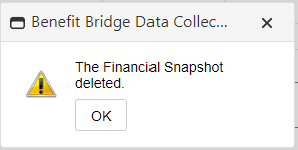
    Otherwise, you will see a confirmation dialog to confirm the delete
    Finanical Snapshot grid image

Add a Service
  1. Click the Add Service link in the Service grid.

    The service form will be displayed.
    Enrollment form image
    • Service Date: (required) Select a service date.
      Service Name:Select a service name from the list.
      Pillar:This will be assigned for most Service types, and Pillar and/or Subpillar is required.
      Subpillar:This will be assigned for most Service types, and Pillar and/or Subpillar is required.
      Amount: Some services require an amount. If an amount is required, Required will appear under the amount.
      Description:Enter any information relevant to the service selected.
Edit a Service
  1. Click the Edit button on the Service grid line you wish to edit. Service grid image
    The Edit Service form will be displayed (see image below).
    Edit service image
  2. Make any needed changes to the service information and then click the
    Save
    button to save the changes.
    Cancel changes by clicking the
    Cancel
    button.

Delete a Service
  1. Click the Delete link on the Service line you wish to delete. Service grid image
    You will see a confirmation dialog to confirm the delete